
For a little while I have been getting strange diffraction spikes from the Edge 11/STF8300M system, as seen in the sub below. The brighter stars have 2 diffraction spikes, when they should not have any (no support vanes to cause them). The two spikes are at a 10-20 degree angle from each other.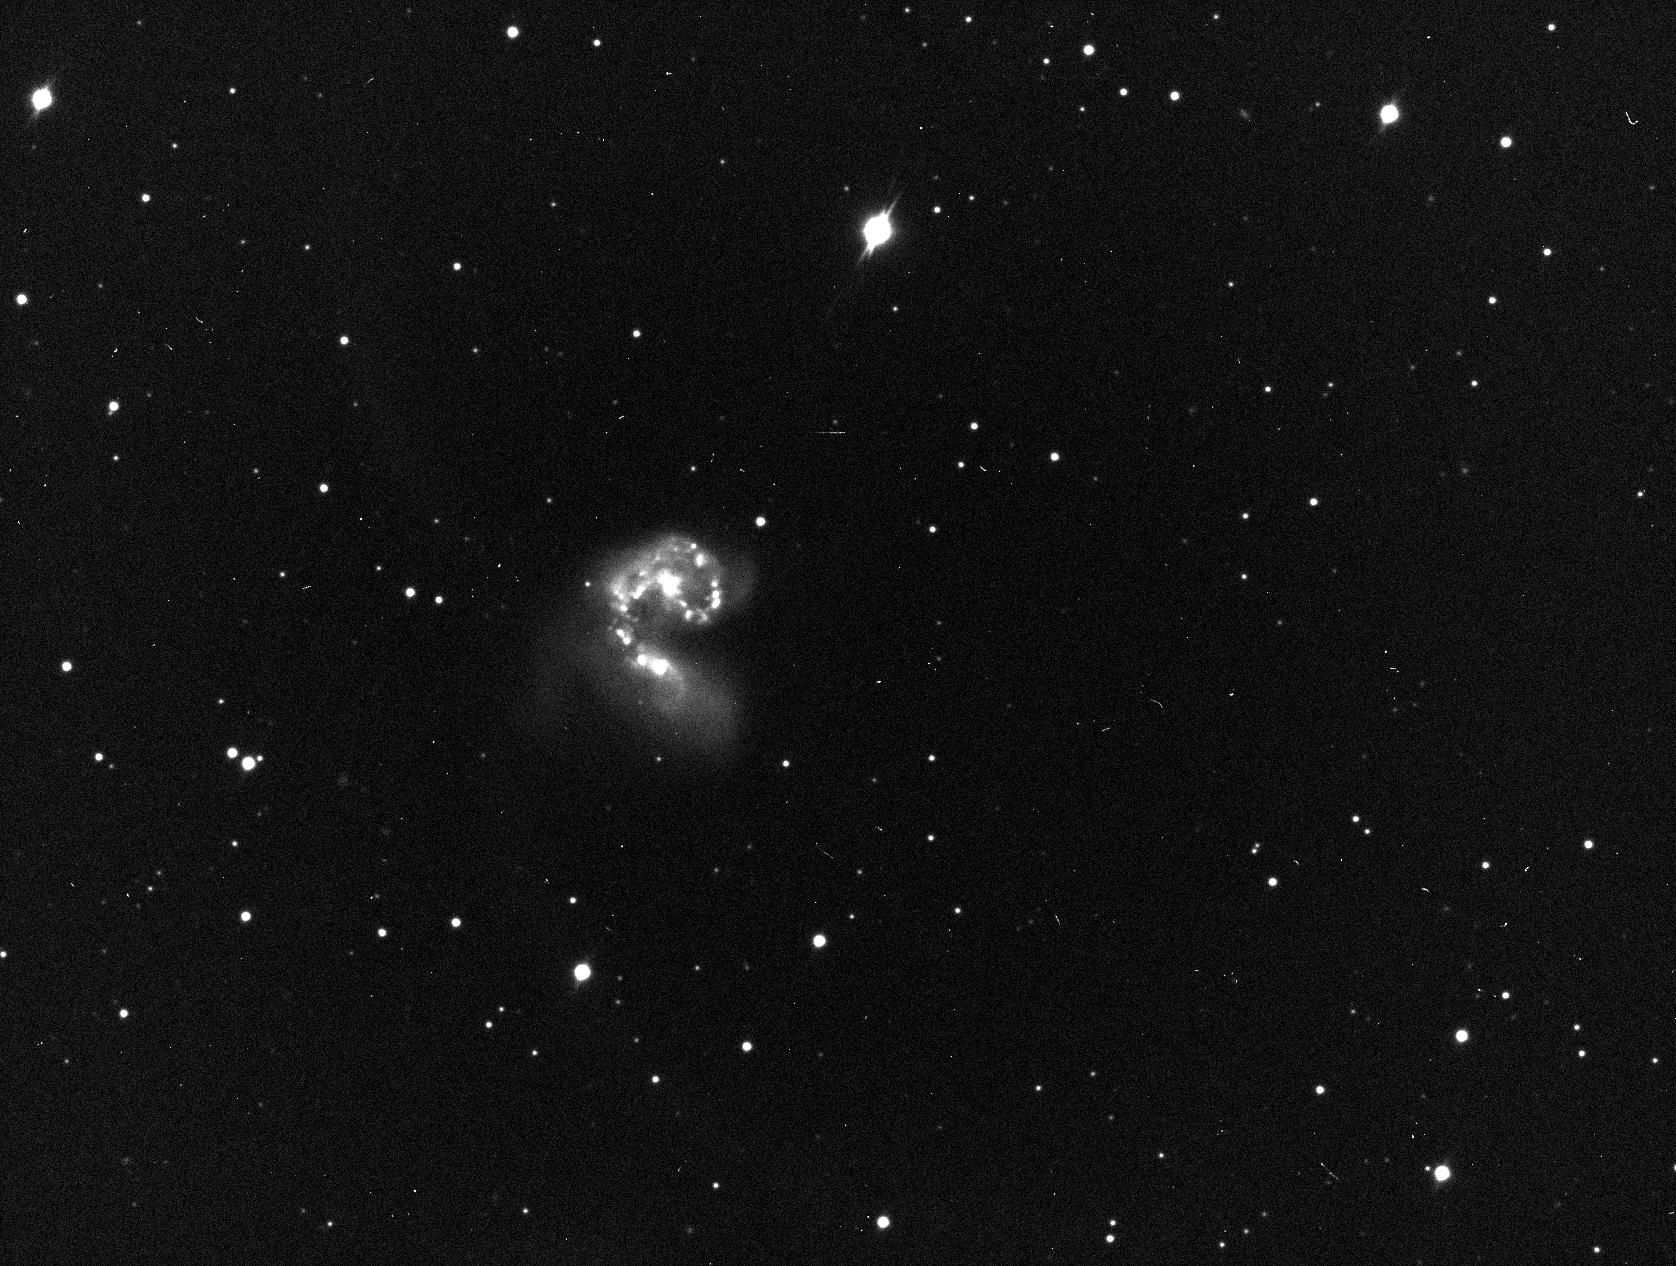
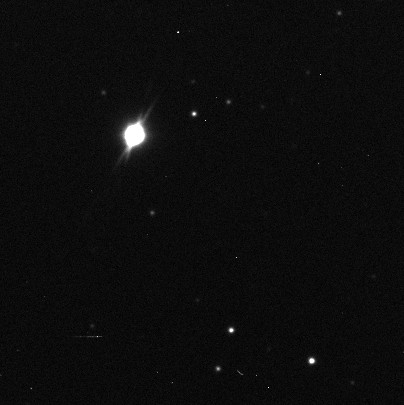
The crop below shows is zoomed in a bit to show the spikes better:
I have been working on my Dome driver for the Arduino controller; I thought these were due to the OTA not pointing accurately out the dome’s slit. However, when I got around to checking, the OTA was in fact pointing precisely out the slit.
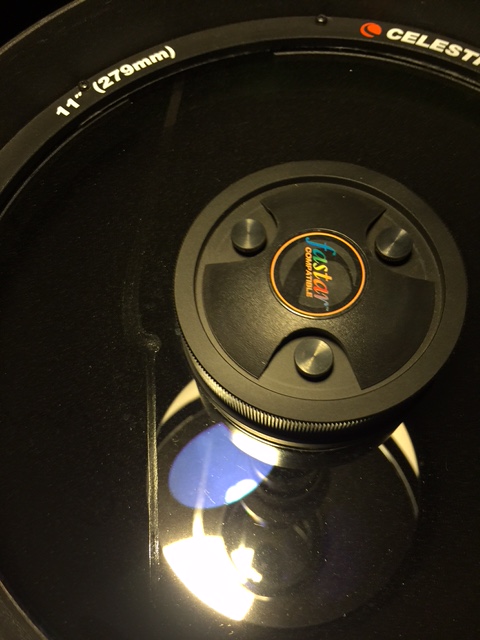
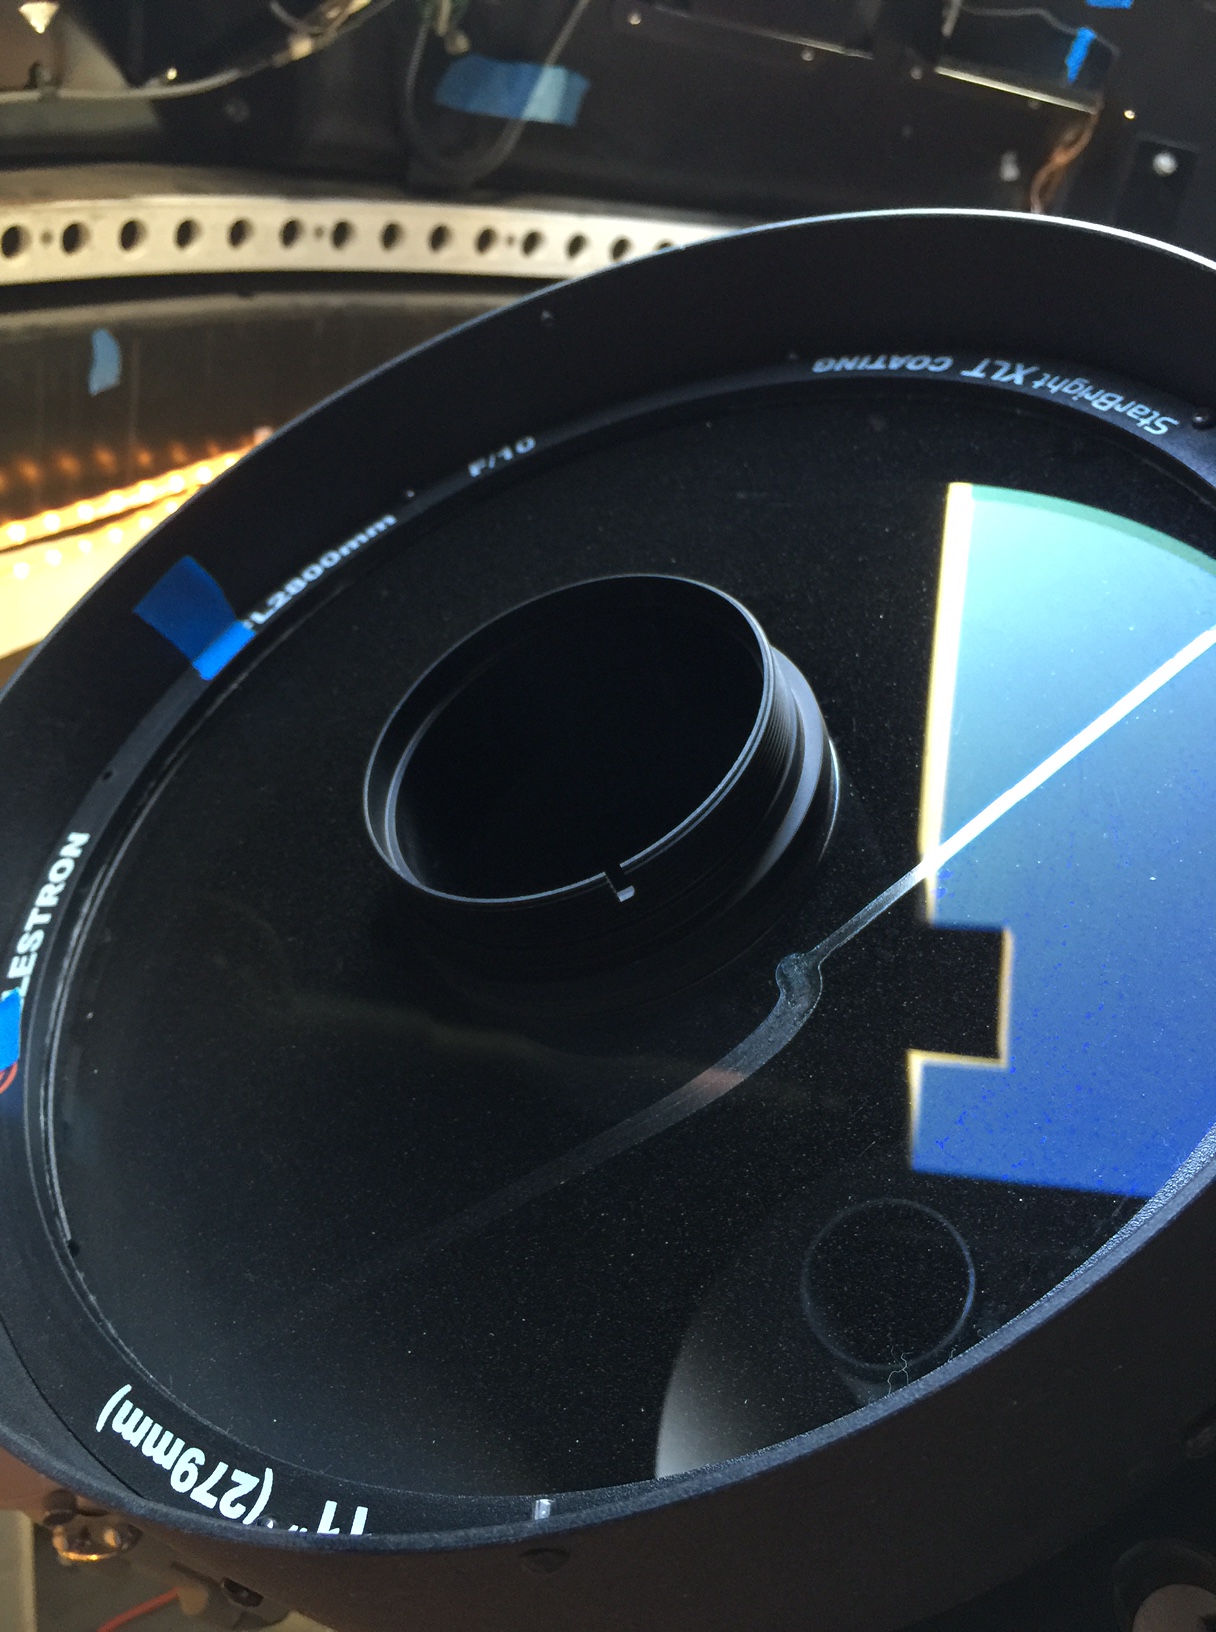
So, I went out and started to look at possible causes. Right off the bat, when I looked at the corrector plate, there were 2 “trails” on the inside of the corrector plate! It looks like a snail crawled down the plate. The trails are at an angle, matching the angle of the diffraction spikes.
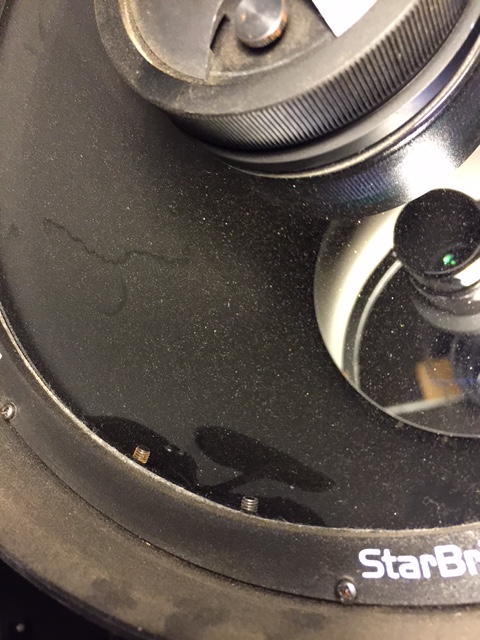 In addition, there are a couple of trails on the inside of the tube, along with a blotchy area. These look like liquid has somehow run down the tube and dried.
There are also a bunch of small drop “splatters” on the inside of the tube. These are hard to see in the image because the corrector is also fairly dirty on the outside.
So, time for a fun new project – removing the corrector plate and cleaning it. I have seen lots of comments about dangerous this is…
Removing the Corrector Plate
Cloudy Nights had a very good description about removing the plate, although no pictures so I don’t necessarily know what they are referring to.
Step 1. Carrier Box
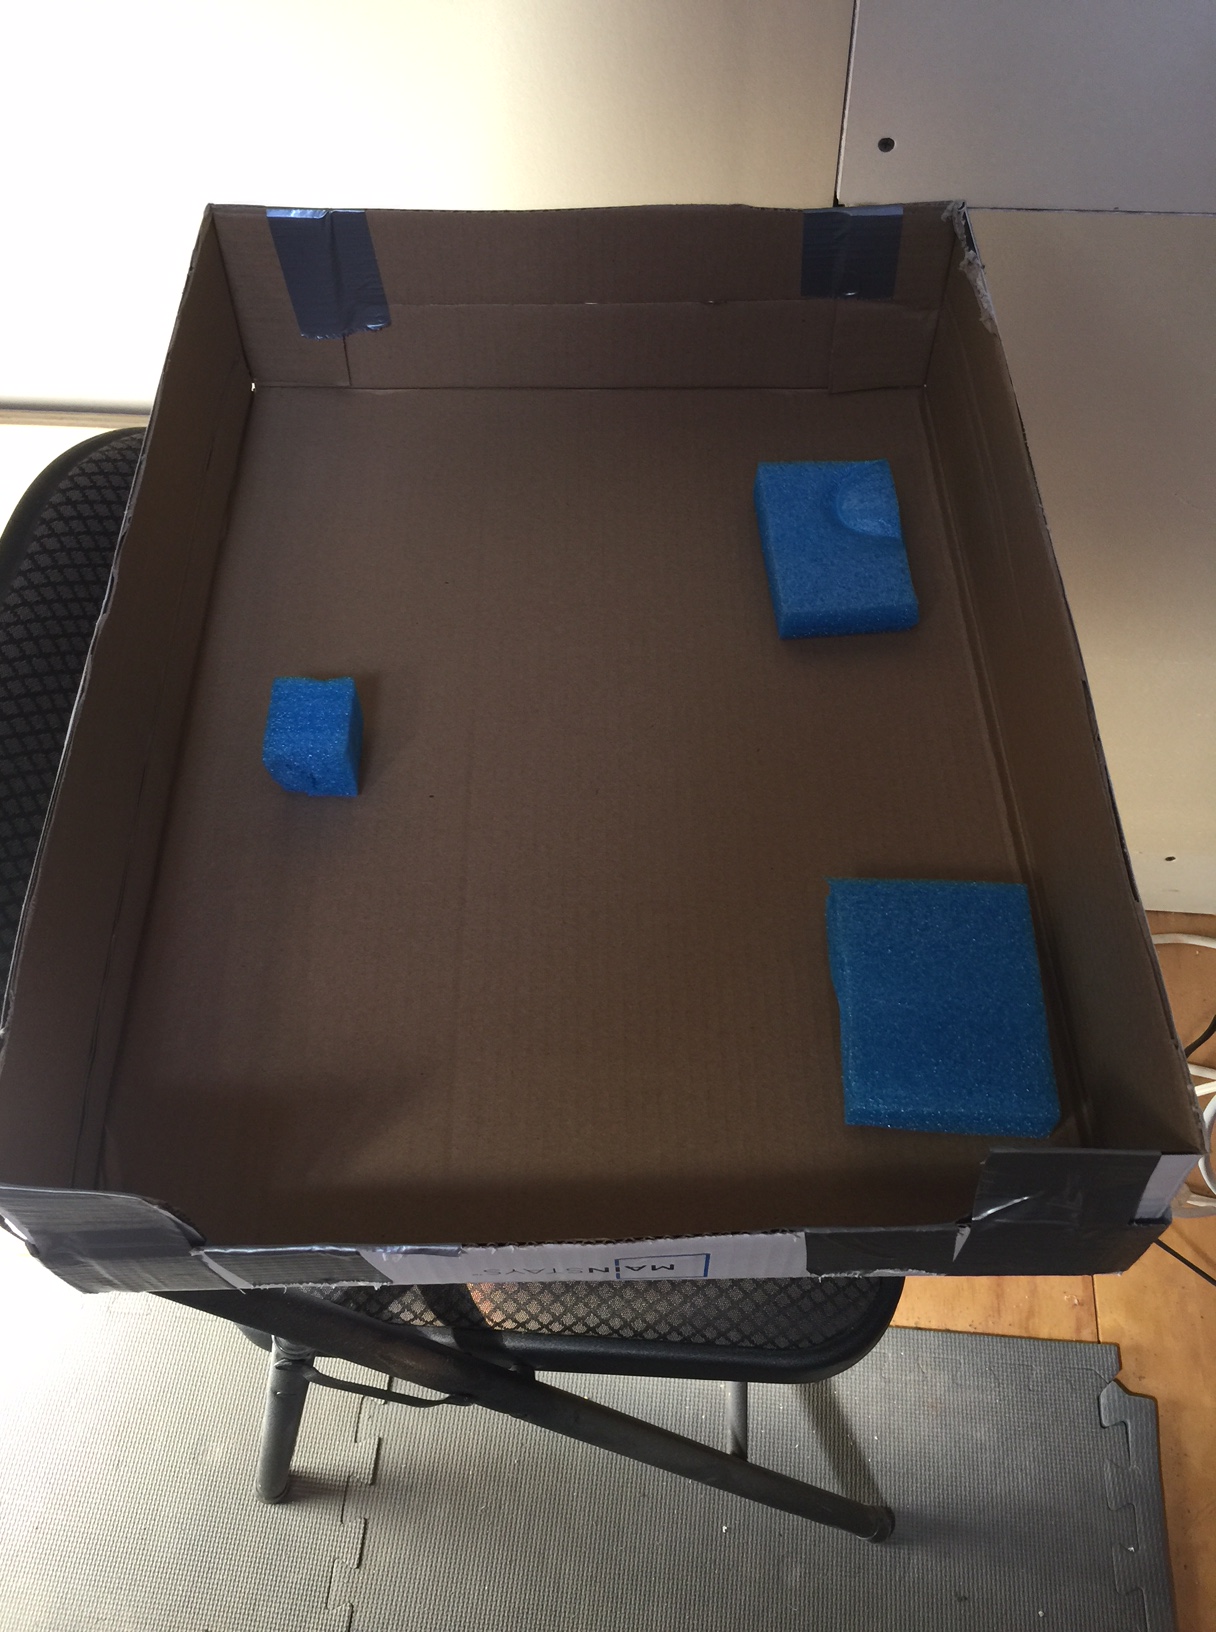 Cut down a cardboard box, taped in a couple of pieces of foam. This will hold the corrector plate when I get it out.
Step 2. Remove the secondary.
Position the scope pointing slightly down and unscrew the secondary.
Am I supposed to remove the holder that holds the secondary? I don’t see how to do it. After I got everything out I tried again with no success. It seems like it should unscrew into two pieces, but maybe they are glued together or something. In the end I do my cleaning with the holder remaining in the corrector.
Problem? The secondary holder is loose in the corrector. It spins easily, and moves laterally a millimeter or so in each direction. Is this right?
Step 3. Position the scope with counterweights up, scope pointing up.

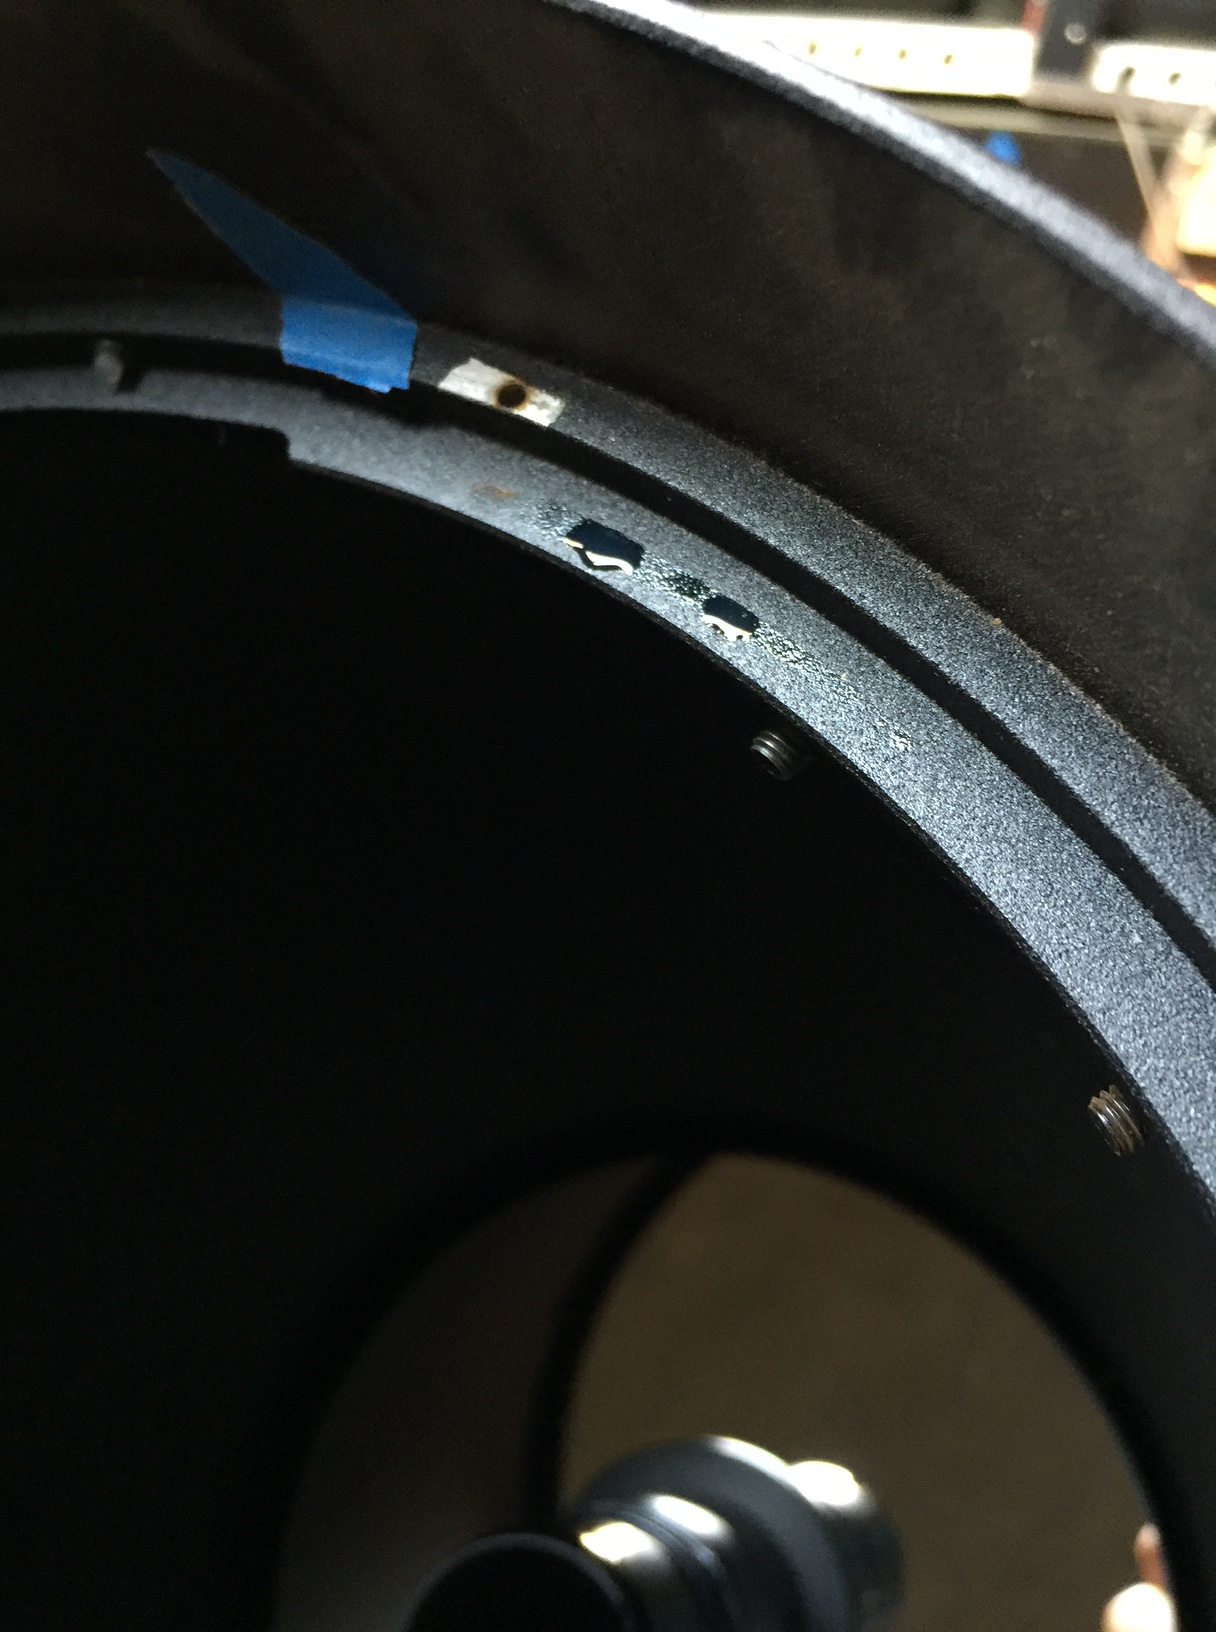
Step 4. Remove the retainer ring.
I don’t know if the positioning of the ring is important. I assume not, but will proceed as if it is:) I put two pieces of blue tape on the ring and tube wall, then cut the tape. The tape pieces will allow me to re-position the ring correctly. Removed 8 screws.
It is tricky getting the ring out. There are two pins sticking out for holding the lens cap. I had to squeeze the ring a bit to get by the pins.
Step 5. Remove Corrector plate.
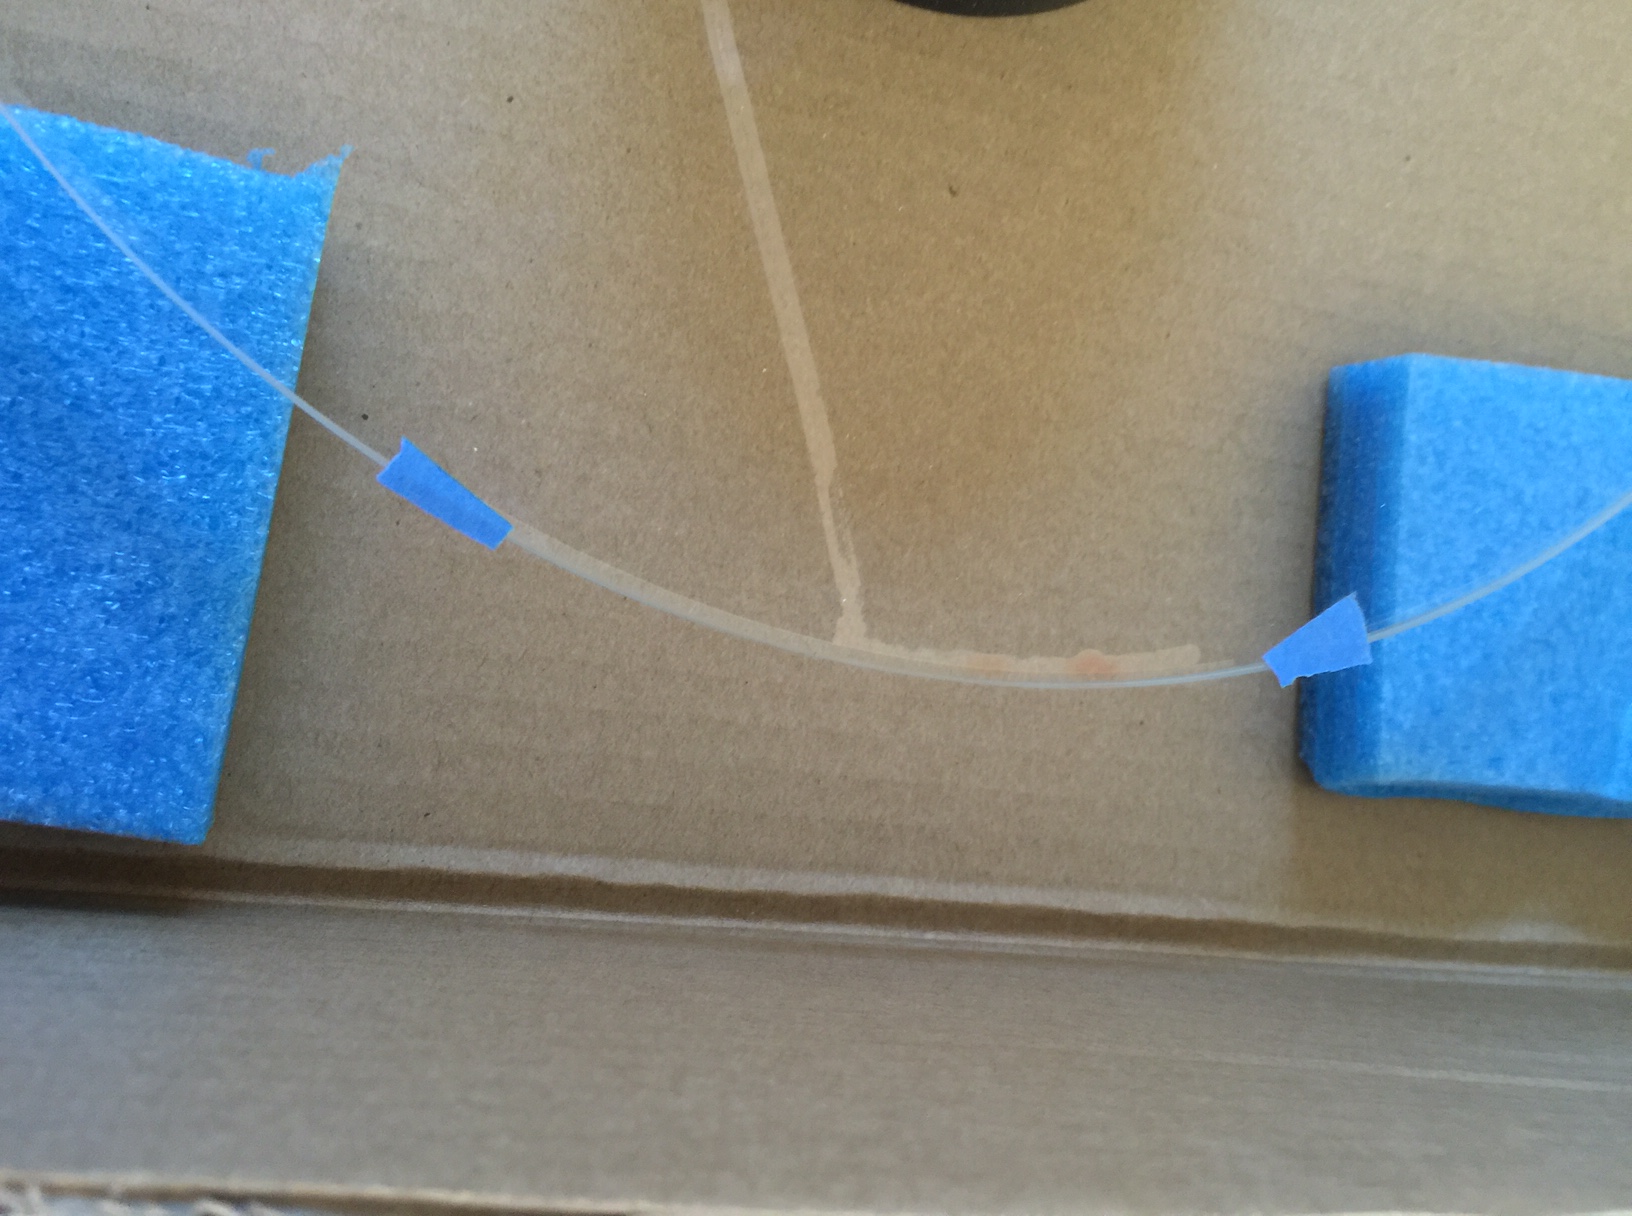
Marked the plate position with two more pieces of blue tape. Couldn’t find the holding/adjustment nylon pins discussed on CN.
Pulled on the plate (using the plastic secondary holder tube) and it popped out. OK, now I see the nylon adjustment pins I was supposed to loosen.
Danger, Will Robinson! OK, this is weird. There is liquid in two places on the corrector plate edges, and on the corresponding support ring. The liquid is clear but kind of oily/viscous. I have no idea what this is, but I’m pretty sure it is the same stuff that left the trails on the corrector and the tube.
Remote Possibility: Several months ago (4-6?) I cleaned the corrector plate. I used a solution of isopropyl alcohol and water, applied with cotton balls. I suppose it is possible that some of the solution slipped past the corrector. However, I can’t imagine a) there was enough solution to run like this, and b) how could iso and water not evaporate in the Arizona over multiple months?
Step 6. Clean inside of tube?
Tried to clean the specks on the interior of the tube. I’m afraid of messing up the tube, so in the end I left the inside alone.
Step 7. Cover opening with Saran Wrap.
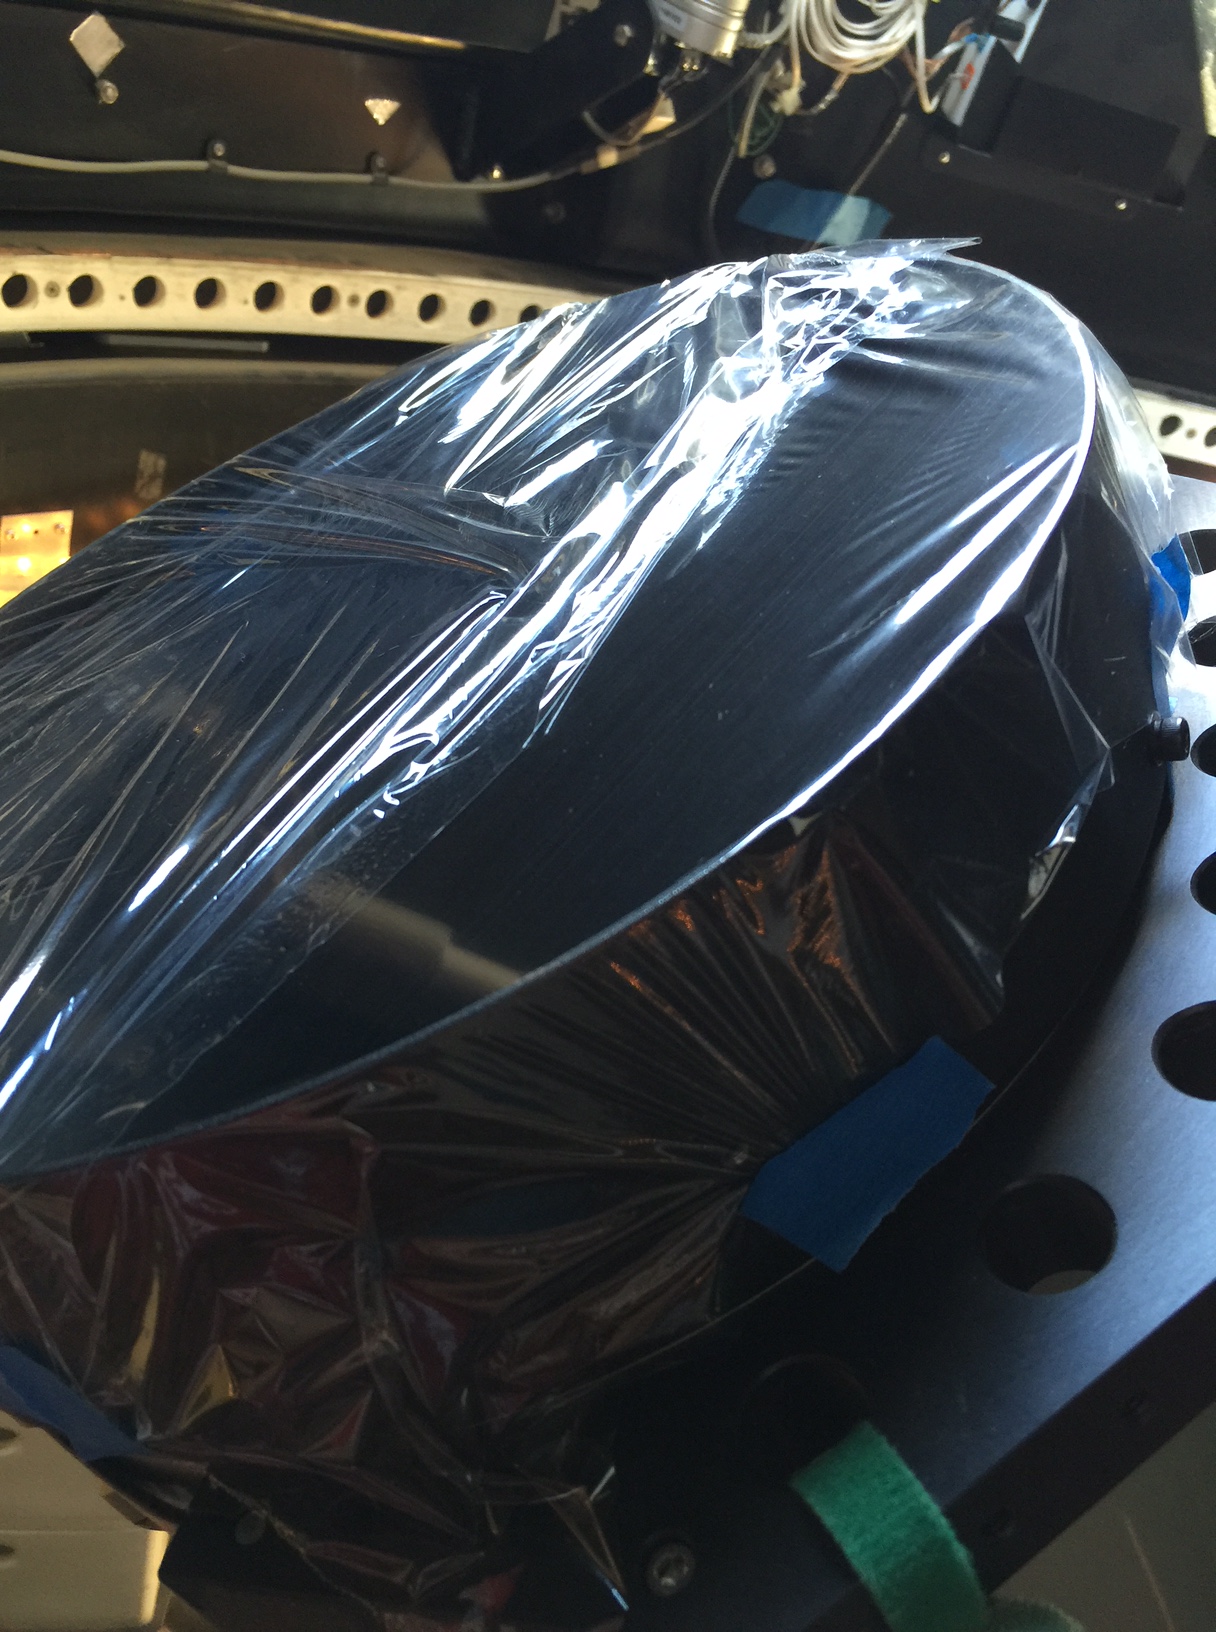 To prevent dust blowing into the tube while I work on the corrector, I covered the OTA opening with Saran Wrap. The wrap doesn’t stick to the OTA like I expected, so more blue tape to hold the wrap in place.
Cleaning the Corrector
I followed the steps laid out by Clay Sherrod at Arkansas Sky Observatory. Assembled all the solutions, filtered, mixed… Got some rubber gloves to handle the corrector so I don’t get fingerprints on it; oops, the gloves themselves leave prints. I end up handling it by the secondary holder that I could never get out.
The tracks on the corrector plate are mostly removed. If I breath on the plate I can still see them, but otherwise they are gone.
Cleaned the outside face of the corrector as well. There are very small spots which I cannot get off. Tried a variety of things with little effect. Sometimes I could get one, but not often. They are hard to see anyway. Oh Well.
Reassembly
Put everything back together, no problems. When putting the plate back in, I loosened two of the nylon alignment pins precisely 1/4 turn. This allowed the plate to pop back in, after which I tightened back the 1/4 turn.
Collimation
Hurray – more problems. First, the secondary still rotates easily and moves laterally. I had hoped that putting the secondary back in would tighten things down somehow. Did it do this before and I never noticed?
Second, I cannot get it to collimate. The stars are huge donuts. Adjusting the screws as usual ends up with one of the screws being completely tightened. Of course that one needs to be tightened more.
I think I have not assembled the secondary correctly? I will need to talk to Celestron and see if they can help.